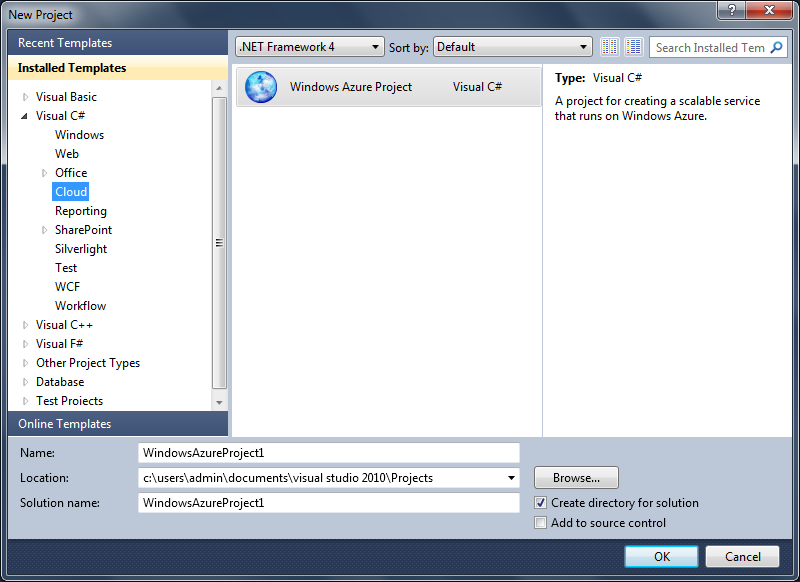
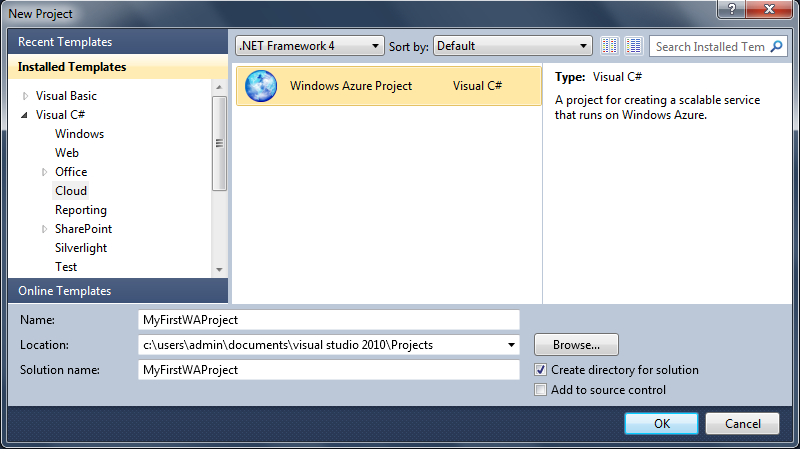
If you have directly landed on this page, check out [ASP.Net application deployment in Windows Azure Environment] post first.
In this post we will see how to migrate our Local SQL Database to SQL Azure. But before that we will see, What is SQL Azure ?
What is SQL Azure ?
SQL Azure is a cloud based database service offered by Microsoft similar to those offered by Amazon.
So should we say that now SQL Azure is nothing but the SQL Server 2008 R2 residing in the cloud ? The answer to this is “NO“. SQL Server 2008 R2 & SQL Azure are totally different platforms offered by Microsoft. SQL Server 2008 R2 is a product designed to be On-premise, Where as SQL Azure is a platform as a service (PAAS). But if we talk about, What all things we can do on SQL Azure ? then the answer is almost all the things which we were doing in SQL Server Standalone (except those requiring physical administration. since we do not have control over the physical resources of SQL Azure). Only thing here is, the way of doing certain operations on SQL Azue may differ from that of doing on On-premise instance of SQL Azure.
Every platform has its pros & cons and SQL Azure also has its own. But for the time being we will leave behind the topic of pros & cons of SQL Azure and focus on How to migrate the SQL Server R2 Database to SQL Azure.
So we will perform this operation step by step as follows :
- Creating a New (blank) SQL Azure Database using the Management Portal of Windows Azure Platform. [ Note for accessing the Management Portal you must have a subscription ]
- After successfully creating the New SQL Azure Database, go back to your SQL Server Management Studio & generate the script of the database which you want to migrate. For generating the script, right click on database >> goto Tasks >> click on Generate Script option.
- In “choose objects to generate scripts”, select entire database, as we want to generate script for entire database. It up to you for which object of the database you want to generate the script.
- As we are generating the script for SQL Azure, we need to do certain settings for that and hence before generating the script, click on Advanced Settings button to set the scripting option.
- Change the Script for Server Version to “SQL Server 2008 R2”
- Change Script for Database Engine Type to “SQL Azure Database“. This we automatically make all the required changes to the script to make is compatible with SQL Azure Database.
- Generate the Script.
- After generating the script, two very important changes which you need to take care of are : (1) Change datatype of columns having varchar(max) or text datatype to nvarchar(max). (2) Make sure that all the tables in your database are having Clustered Index.
Now if you have completed all the above given steps, it means that your script is ready to be executed in SQL Azure.
For executing the script you have two options : either you connect to the SQL Azure using your Management studio, or go to the Windows Azure Management portal & then execute the script to migrate your database objects to SQL Azure.
For transferring the data to SQL Azure, you can either generate the data in the form of the script or you can use Export Data Option ( Right Click on Database >> Tasks >> Export Data). In this case of Export Data Option you will be asked to enter the server name which you can get from you Windows Azure Management Portal.
For generating script for data, you just have to go to Advanced button & change value of “Type of Data to script” to Data only. If you want to insert data using the same script used for creating the database, then you have to set the value of “Type of Data to script” to “Schema & Data“, This will create the tables & insert the data at once.
So here we complete the Step 2 – Migrating the Local SQL Server Database to SQL Azure. In the next post we will see Step 3 – Deploying the WA project which we created in Step 1 to Windows Azure Platform.