In this note we will see (step 1) of ASP.Net application deployment in WAP i.e. Creating a Windows Azure project for our ASP.Net application.
If you have directly landed on this page, check out [ASP.Net application deployment in Windows Azure Environment] post first.
Before starting the first step, there are some requirements which we need to fulfill.
Requirements :
- Simple asp.net application with proper sql server database connectivity.
- Need visual studio 2008 with sp1 or visual studio 2010
- Need to download and install Windows Azure SDK (latest) for VS & VS Tools for WA.
Above given were the basic requirements which we need for our first deployment of asp.net application in Windows Azure platform.
Considering that we have all the things ready, we will continue with the procedure of creating a WA project for our asp.net application. For creating WA project for our application go to:
File >> New Project >>
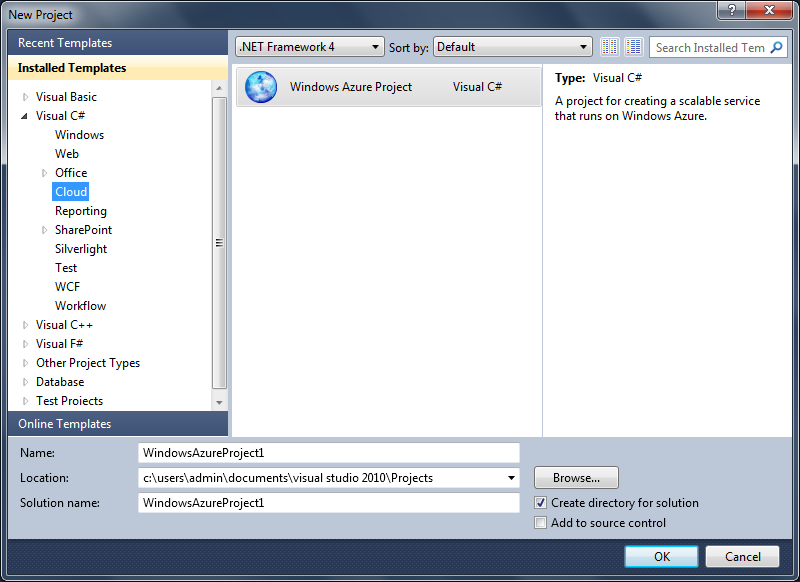
Under installed templates we will see Cloud option. When we click on the cloud option, we will be able to find Windows Azure Project. See the image shown below :

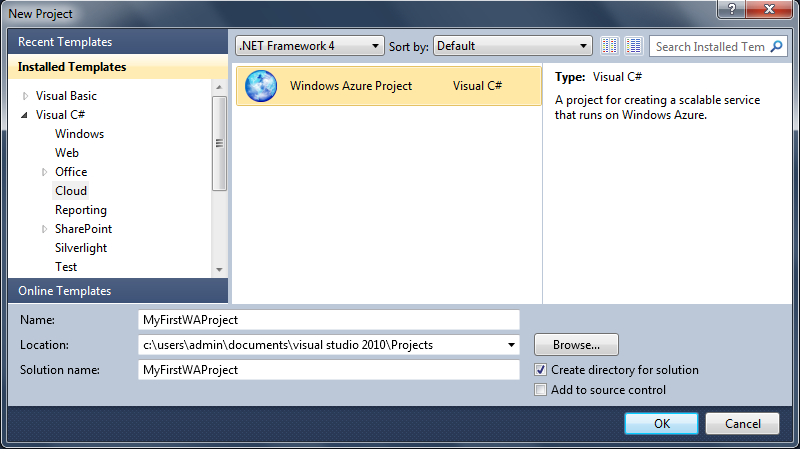
Give appropriate name to the Project & Solution & click on ok to create the project. See the below shown image :

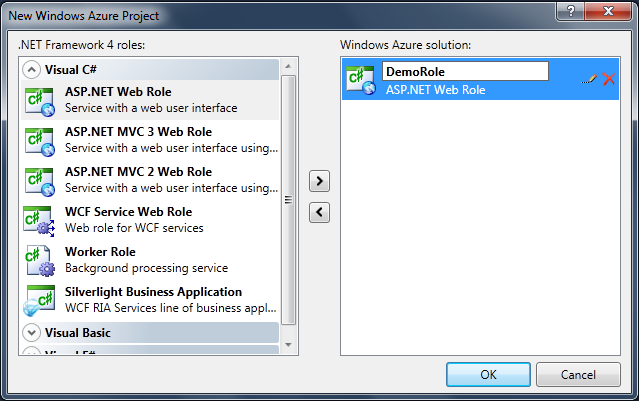
After clicking OK, one new dialog box will open showing the .Net framework 4 Roles . If you remember in the first note we heard about the terms web role (web application) & worker roles (background running applications). So in this dialog box we will be able to see different type of web roles & worker roles. As we said in the previous note that here we will be only working with simple ASP.Net Application, so we will select ASP.Net Web Role and add it to our Windows Azure Solution. After moving the ASP.Net Web Role to our solution, we need to rename the WebRole from “WebRole1” to appropriate Role Name (In our case we will take as “DemoRole”) and then click OK to proceed further. Ckeck out the image shown below :

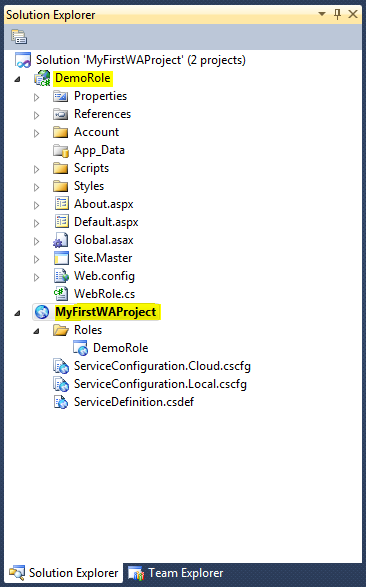
Now under solution explorer you can see :
- Solution with the name “MyFirstWAProject”
- Under the solution we will see two projects created. one will be our Windows Azure Project which we created initially with the name “MyFirstWAProject” & another will be our WebRole with the name “DemoRole”
When we try to explore our Windows Azure Project, we find a folder Roles containing the WebRole i.e. “DemoRole”. So indirectly we can say that here our ASP.Net Application is mapped with the Windows Azure Project. Apart from the Roles folder, we will also see a three files :
- ServiceConfiguration.Cloud.cscfg
- ServiceConfiguration.Local.cscfg
- ServiceDefinition.csdef
[ Note : If Windows Azure SDK ver 1.5 or lesser is installed on our system then we will be able to see only two files : ServiceConfiguration.cscfg & ServiceDefinition.csdef. If higher version than 1.5 is installed then only we will be able to see three files. ]
See the image shown below :

So here we have completed our first step that is “Creating a Windows Azure project for our ASP.Net application”. Now what about ServiceConfiguration & ServiceDefination Files? Why they are necessary? All these questions we will see in our later notes. For the time being, we just have to make a note that for deploying & running our application on cloud (WAP), the first & the foremost step and of-course the mandatory step is to create a Windows Azure Project for our application.